Lantronix Xport Configuration
Adding the Xport
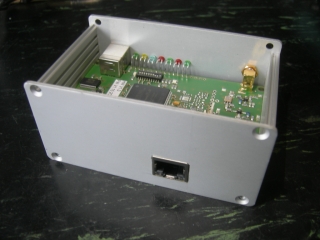
In HW-Version 1.0 ist der Xport Anschluss auf der Unterseite der Platine
installiert. Leider passt der Lantronix Xport nicht in die Box da zu wenig Raum
zwischen der Box und dem PCB ist. Das alles erfordert eine 38mm innen hohe Box
für die Auswahl.
|
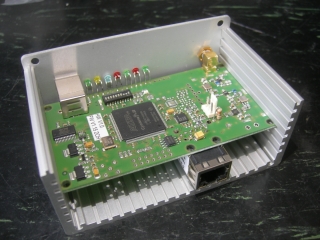
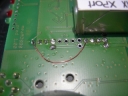
Adding two capacitors (provided with Xport, maybe I will pre-do this
for those ordering Xports) to the top side of the PCB
The small capacitor on the left side is 100nF, size 0603 The larger
one on the right side is 10µF...47µF, minimum 5V
There is no need to cut the two mounting pins of the Xport as I
did! |
 |
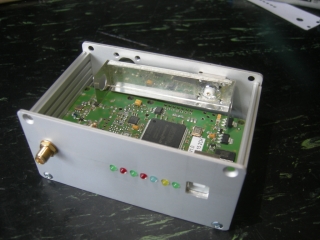
| Install the Xport on the bottom side of the PCB |
|
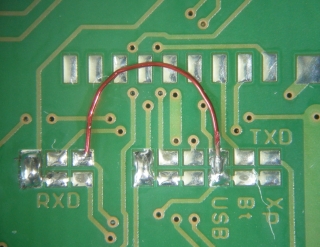
Adding a small wire bridge at the RS232 multiplexer for the TxD
signal. (most probable I will pre-do this for those ordering Xports)
As you see it here, the output is routed to USB and Xport in parallel,
while RTS and the eventual RxD input are routed to USB only. |
 |
5V Energieversorgung
 |
Die 5V Energieversorgung kann an den zwei Löt-Pads
hier in der oberen rechten Ecke angeschlossen werden.
Das Löt-Pad mit 4 Verbindungen an der Unterseite, das ist [-], das
andere ist [+].
Jede Energieversorgung sollte 5V/1A Minimum haben, um sicher zu sein,
dass genug Zeit bleibt, die für ein sicheres Rücksetzen erforderlich
ist. |
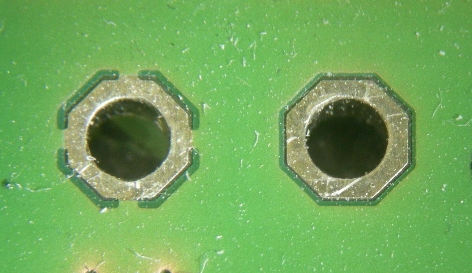 |
DC input pads:
Hier in der großen Ansicht:
Das linke Pad mit vier verbindungen an der Unterseite ist GND,
der andere ist 5V |
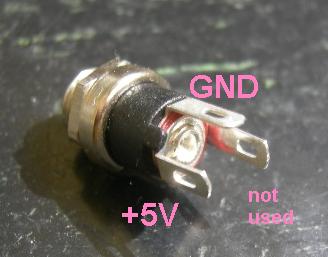 |
Der Energieversorgungsstecker, wird wie gezeigt,
rechts gelötet
Der Stecker, der nicht verwendet wird, kann entfernt werden |
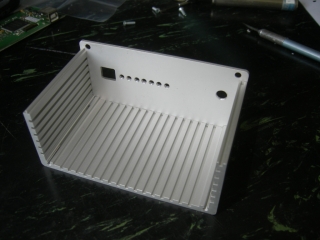
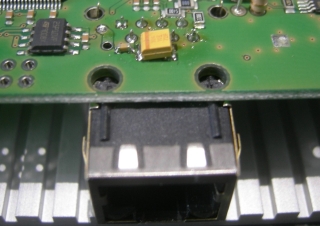
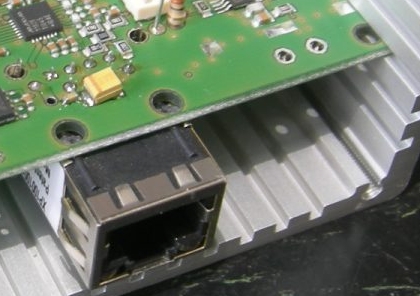
Box Mounting
Die Standard-Box reicht nicht für den Xport,denn es ist zu wenig
Platz unter dem PCB. Mit der größeren box von 38 mm höhe, passt ein Xport und
ein zusätzlicher miniADSB. Sehen Sie hier einige Eindrücke davon, wie das
aussieht..
Xport Configuration
Hinweis:Bei Verwendung eines Xport
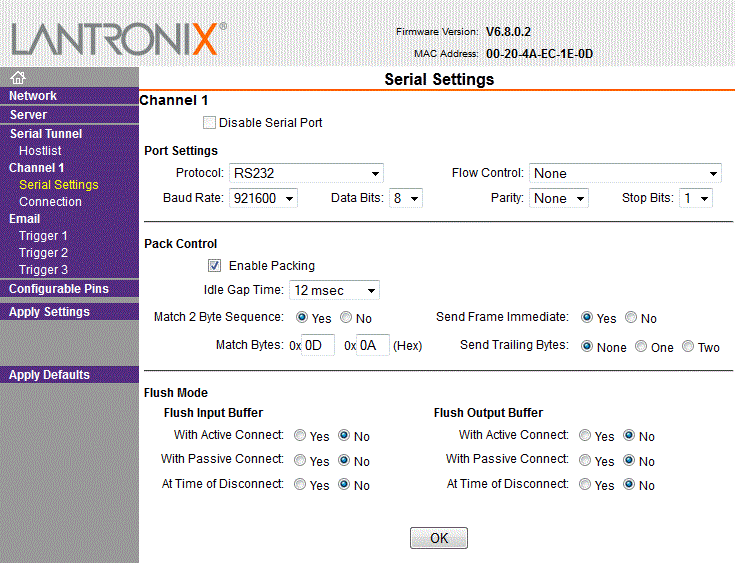
müssen Sie die RS232 Baudrate auf 921800 bit / s einstellen. Wenn Sie zwei
Geräte parallel verwenden wollen, wie USB und Xport könnte es funktionieren,
dass die FT232R für 1MBit paralell konfiguriert ist . Andernfalls müssen Sie
eine gemeinsame Baudrate, die zum Beispiel 115200 Bit / sec für Xport und RS232
wählen.
Bitte beachten Sie, dass der Xport ein
Netzwerkgerät und dieBedürfnisse für eine höhere ausgefeilte Konfiguration
ist!
Einstellungen für TCP mode
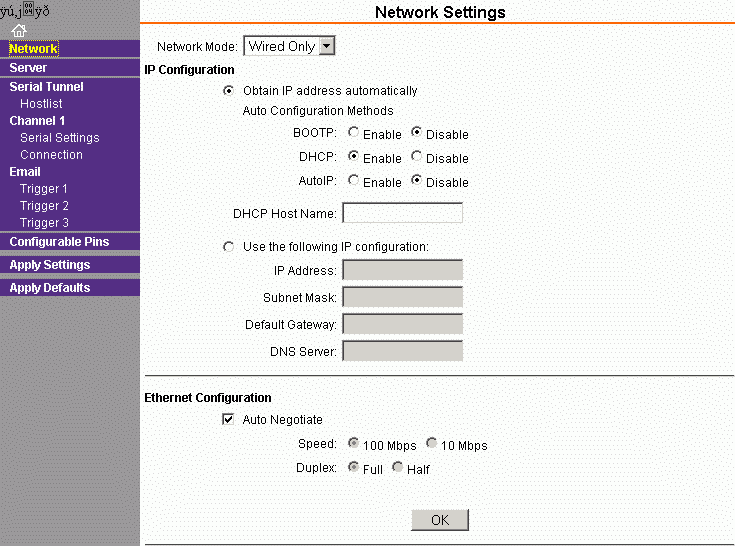
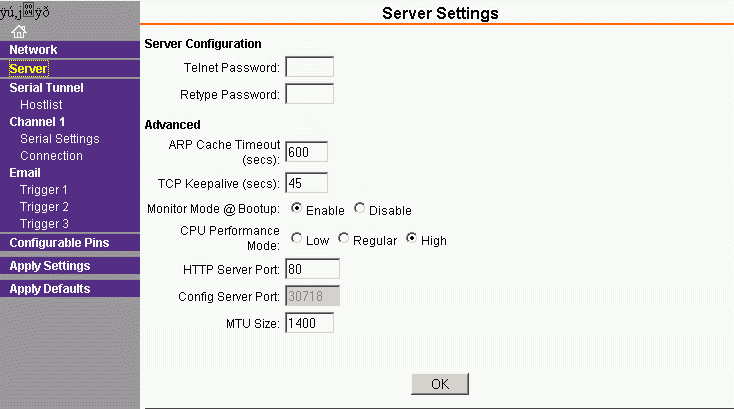
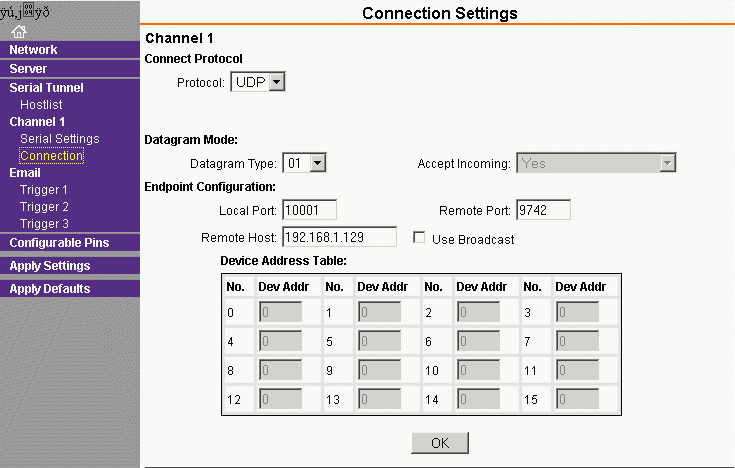
Xport Network Setup
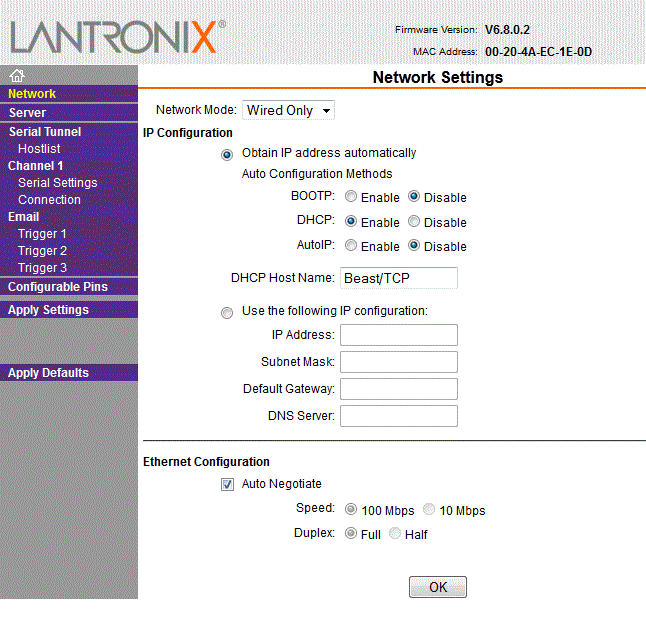
Important
Note:
While configuring, you always
have to
press "OK" button at the
bottom, plus "Apply
Settings"
in the left hand menu. |
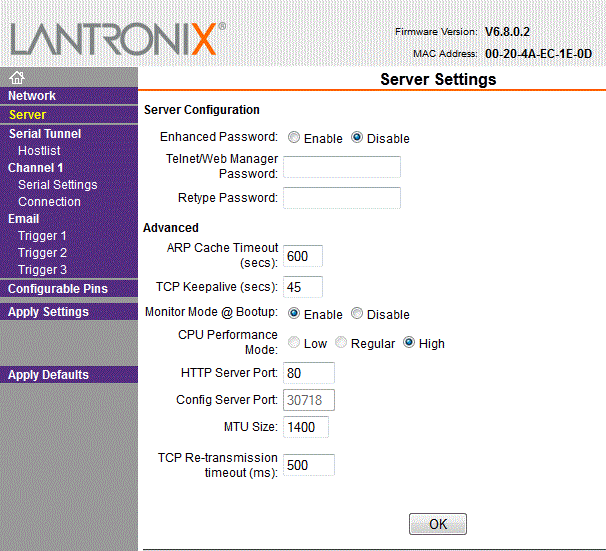
Xport Server Settings
 |
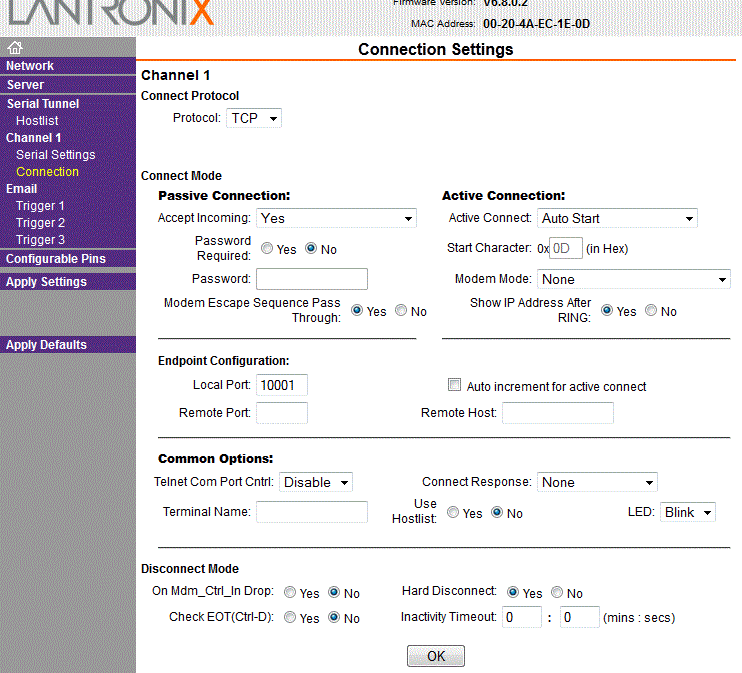
Xport Connection Settings
 |
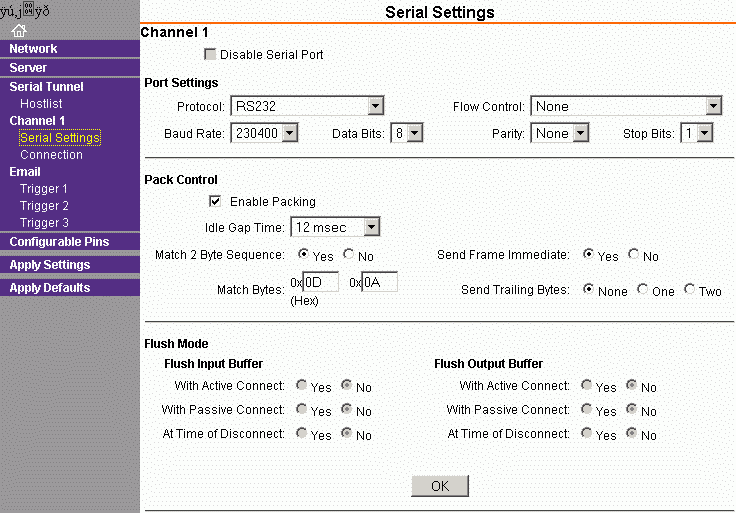
Xport Serial Settings
 |
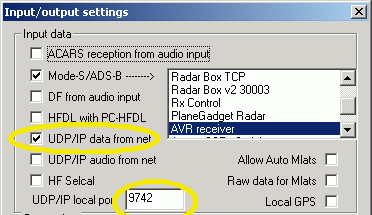
Einstellungen für UDP mode
Dieser Modus wird verwendet, um direkt Daten an das Mode-S Beast über das
Netzwerk an Planeplotter zu senden.
Planeplotter Setup
 |
Xport Network Setup
Important
Note:
While configuring, you always
have to
press "OK" button at the
bottom, plus
"Apply
Settings"
in the left hand menu. |
Xport Server Settings
 |
Xport Connection Settings
 |
Xport Serial Settings
 |
Die Netzwerklast bei einem 100MBit LAN ist sehr gering, zu meiner
überraschung war weniger als 1%
Einstellungen für TCP mode/COM port über
ethernet
In gleicher Weise gibt es einen Treiber für eine
virtuelle COM-Schnittstelle, die auf dem PC als serielle
Schnittstelle erscheint.Einige properitary Modi
erfordern TCP Konfiguration des Xport.
Wenn Sie
keine Schnittstelle haben die UDP-oder TCP-Daten in
Ihre Anwendung benötigen, aber einen COM-Port, schauen Sie sich
die Lantronx Com Port
Redirector an.
FAQ
- Q: Gibt es eine Möglichkeit auf die
Werkseinstellungen zurücksetzen XPort
Direct ohneSeriennummer?
A: Telnet auf Port 9999. Dann
erhalten Sie eine einfache Konsolenanwendung Menü, ähnlich
wie das BIOS-Setup Ihres PC. Einfach auf die
Werkseinstellungen zurücksetzen, speichern und schließen.
- F: Wie aktualisiere ich
die Firmware des Lantronix Xport
A: Es gibt
eine FAQ von Lantronix, sicherzustellen, dass
die Hardware-Revision des Lantronix, passt.